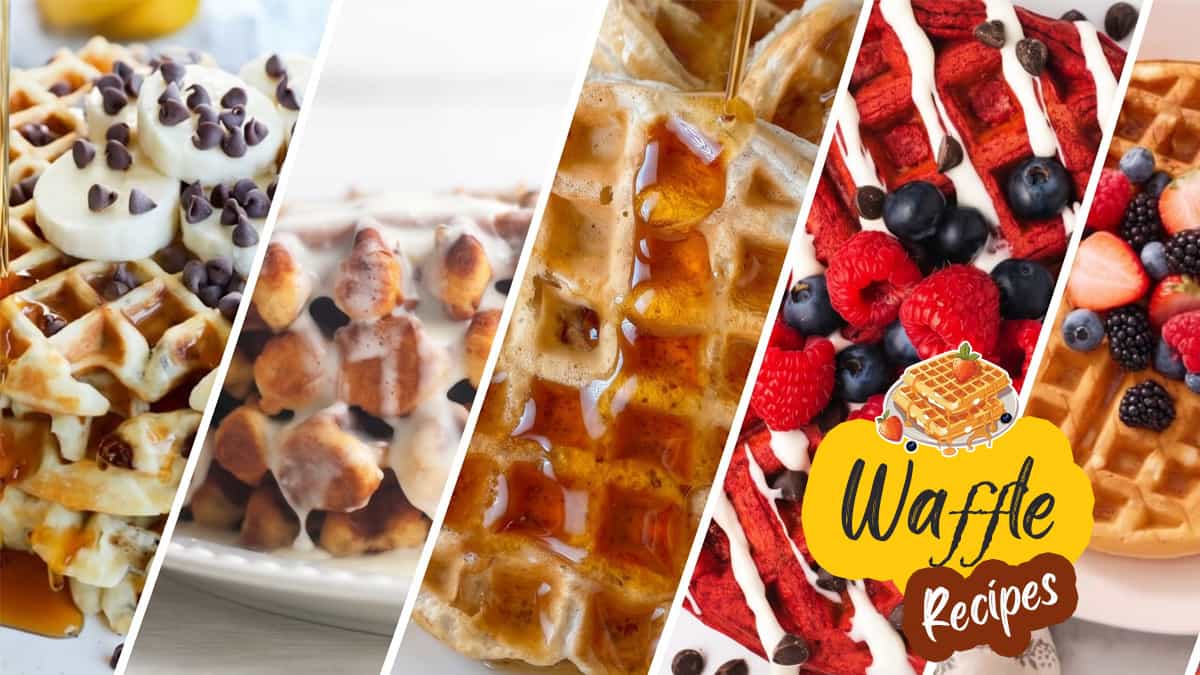
Waffles are one of those foods that can go from a simple breakfast to a full meal or dessert with just a few ingredients. Their crisp edges and soft, fluffy centers make them perfect for everything from classic butter-and-syrup breakfasts to crispy chicken and waffles, fruit-topped brunch dishes, savory meals, and sweet desserts.
🧇 Did you know? August 24 is National Waffle Day in the U.S. Waffles also have their own long-standing celebration in Sweden, where March 25 is Waffle Day, or Våffeldagen. So whether you prefer crispy Belgian waffles, blueberry waffles, or chicken and waffles, there is more than one excuse to make a batch.
In this collection, you’ll find 60+ waffle recipes organized by how you want to enjoy them—from classic breakfast waffles and chicken & waffles to fruit-filled creations, savory waffles, waffle sandwiches, desserts, and more.
What Are Waffles?
- Common name: Waffles
- Main ingredients: Flour, eggs, milk, fat, and a leavening agent
- Taste: Mild, buttery, lightly sweet, and crisp on the outside
- Texture: Crisp and golden outside with a soft, fluffy center
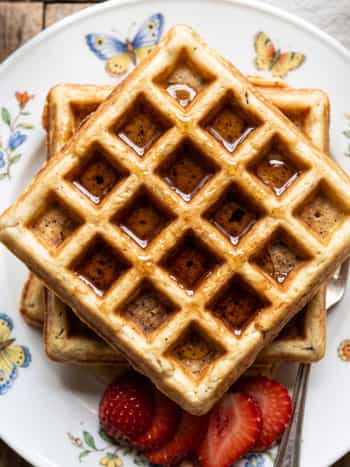
- Appearance: Grid-patterned cakes cooked in a waffle iron
- Popular varieties: Belgian waffles, American waffles, Brussels waffles, Liege waffles, potato waffles, and more
- Common toppings: Butter, maple syrup, fruit, whipped cream, chocolate, ice cream, and savory toppings
PLEASE NOTE
In Case the Recipe Page Doesn’t Load or You Don’t Find the Recipe on the Given Link: Simply close the tab and report it as “Recipe Not Found.” We’ll check the link and investigate.
🧾 Ways to Cook Waffles
Chicken & Waffles
- Classic Southern Chicken & Waffles with Buttermilk Tenders & Cornmeal Waffles – Click to Get Recipe
- Crispy Fried Chicken & Waffles with Maple Syrup or Hot Honey Drizzle – Click to Get Recipe
- Hot Honey Chicken & Waffles with Panko-Crusted Thighs & Sriracha Honey – Click to Get Recipe
- Nashville Hot Chicken & Waffles with Cayenne Butter Sauce & Maple Butter – Click to Get Recipe
- Nashville Hot Chicken & Waffle Sandwich with Pickles & Sriracha Mayo – Click to Get Recipe
- Nashville Hot Chicken & Waffle Sliders with Buttermilk-Pickle Brine – Click to Get Recipe
Breakfast & Brunch Waffles
- Classic Buttermilk Waffles with Vanilla & Melted Butter – Click to Get Recipe
- Belgian Waffles with Whipped Egg Whites & Deep Pockets – Click to Get Recipe
- Fluffy American Waffles with Whipped Egg Whites & Vanilla – Click to Get Recipe
- Cinnamon Waffles with Brown Sugar & Ground Cinnamon – Click to Get Recipe
Blueberry Waffles Recipes
- Blueberry Waffles with Fresh Blueberry Sauce – Click to Get Recipe
- Blueberry Buttermilk Waffles with Crisp Golden Exterior – Click to Get Recipe
- Lemon Blueberry Waffles (Vegan & Gluten-Free) with Almond Flour – Click to Get Recipe
- Blueberry Muffin Waffles with Extra Sugar & Whole Berries – Click to Get Recipe
- Blueberry Waffles with Heavy Cream, Buttermilk & EZ Gel – Click to Get Recipe
Banana Waffles Recipes
- Banana Waffles with Buttermilk & Mashed Ripe Banana – Click to Get Recipe
- Banana Bread Waffles with Cinnamon & Nutmeg – Click to Get Recipe
- Vegan Banana Waffles with Oat Milk & No Eggs – Click to Get Recipe
- Banana Waffles with Chocolate Chips & Whole Wheat Pastry Flour – Click to Get Recipe
- Peanut Butter & Banana Waffles with Creamy PB Batter – Click to Get Recipe
Fruit & Dessert Waffles
- Strawberry Waffles with Fresh Berries & Whipped Cream – Click to Get Recipe
- Banana Chocolate Chip Waffles with Mashed Banana & Mini Chocolate Chips – Click to Get Recipe
- Apple Cinnamon Waffles with Grated Apple & Warm Spice – Click to Get Recipe
- Red Velvet Waffles with Cocoa Powder & Cream Cheese Icing – Click to Get Recipe
- Chocolate Waffles with Cocoa Powder & Whipped Egg Whites – Click to Get Recipe
- Lemon Blueberry Waffles (Vegan & Gluten-Free) with Almond Flour – Click to Get Recipe
- Nutella Waffles with Chocolate Hazelnut Batter – Click to Get Recipe
- Carrot Cake Waffles with Cream Cheese Glaze & Warm Spice – Click to Get Recipe
- S’mores Waffles with Toasted Marshmallow & Melted Chocolate – Click to Get Recipe
- Peaches & Cream Waffles with Greek Yogurt & Peach Syrup – Click to Get Recipe
Savory Waffles & Waffle Meals
- Cheddar Cheese Waffles with Parmesan & Chives – Click to Get Recipe
- Cornmeal Waffles with Parsley, Chives & Sweet Corn – Click to Get Recipe
- Potato Waffles with Mashed Potato, Cheese & Milk – Click to Get Recipe
- Spinach Waffles with Feta Cheese & Leafy Greens – Click to Get Recipe
- Herb & Cheese Waffles with Cheddar, Chives & Shallots – Click to Get Recipe
- Ham & Cheese Waffles with Spinach & Cheddar – Click to Get Recipe
- Zucchini Waffles with Cheddar Cheese & Olive Oil – Click to Get Recipe
- Hash Brown Waffles with Egg & Melted Cheese – Click to Get Recipe
- Broccoli Cheddar Waffles with Almond Flour & Green Onion – Click to Get Recipe
- Bacon Cheddar Waffles with Cornmeal, Chives & Cornstarch – Click to Get Recipe
Bacon, Sausage & Meaty Waffles
- Bacon Waffles – Click to Get Recipe
- Sausage Waffles – Click to Get Recipe
- Ham & Cheese Waffles – Click to Get Recipe
- Breakfast Sandwich Waffles – Click to Get Recipe
- Pulled Pork Waffles – Click to Get Recipe
- Steak & Waffles – Click to Get Recipe
- Sausage Gravy Waffles – Click to Get Recipe
- Pepperoni Pizza Waffles – Click to Get Recipe
- Chorizo Waffles – Click to Get Recipe
- Meatball Waffles – Click to Get Recipe
Don't Miss
130+ Unique All-Purpose Flour Recipes: Pancakes, Dumplings, Donuts, Cookies, Tortillas, Pies & More
Waffles as Desserts & Sweet Treats
- Waffles with Ice Cream – Click to Get Recipe
- Chocolate Waffle Sundaes – Click to Get Recipe
- Caramel Waffles – Click to Get Recipe
- Nutella Waffles – Click to Get Recipe
- Waffle Berry Parfait – Click to Get Recipe
- Waffle Bites – Click to Get Recipe
- Waffle Ice Cream Sandwiches – Click to Get Recipe
- Banana Split Waffles – Click to Get Recipe
- Cookies and Cream Waffles – Click to Get Recipe
- Tiramisu Waffles – Click to Get Recipe
Mini, Stuffed & Creative Waffles
- Mini Waffles – Click to Get Recipe
- Stuffed Waffles – Click to Get Recipe
- Waffle Sandwiches – Click to Get Recipe
- Waffle Pops – Click to Get Recipe
- Waffle Bites – Click to Get Recipe
- Hash Brown Waffles – Click to Get Recipe
- Liège Waffles – Click to Get Recipe
- Waffle Tacos – Click to Get Recipe
- Chaffles (Keto Cheese Waffles) – Click to Get Recipe
- Waffle Bowls – Click to Get Recipe
Don't Miss
125+ Banana Bread Recipes to Explore: From Easy Classics to Vegan, Healthy, Air Fryer & More
Sugar Free Waffles
- Classic Sugar Free Waffles – Click to Get Recipe
- Keto Low Carb Waffles – Click to Get Recipe
- Gluten-Free Sugar-Free Waffles – Click to Get Recipe
- Greek Yogurt Whole Wheat Sugar Free Waffles – Click to Get Recipe
- Sugar Free Protein Waffles – Click to Get Recipe
- Almond Flour Keto Waffles – Click to Get Recipe
- Banana Oat Waffles (No Added Sugar) – Click to Get Recipe
- Coconut Flour Waffles – Click to Get Recipe
- Sugar Free Chocolate Waffles – Click to Get Recipe
- Sugar Free Pumpkin Waffles – Click to Get Recipe
25 Pro Chef–level Waffle Tips & Ideas

Batter Prep & Fluffiness Hacks
- Tip #1 – Separate Eggs and Whip Whites to Soft Peaks: Separate eggs, whisk yolks into wet ingredients, and whip whites with a pinch of cream of tartar until soft peaks form. Gently fold whites into batter last using a wide spatula for an airy, cloudlike crumb.
- Idea #2 – Use Melted Brown Butter Instead of Plain Oil: Brown 1 stick of unsalted butter over medium heat until nutty and amber with dark specks. Cool slightly and whisk into batter for a caramelized hazelnut flavor profile.
- Tip #3 – Rest Batter for 30–60 Minutes (or Overnight): Allow gluten strands to relax and starches to hydrate fully by resting batter covered at room temperature for 30–60 minutes or in the fridge overnight.
- Idea #4 – Replace 20% of Flour with Cornstarch: Replace 3 tbsp of all-purpose flour per cup with cornstarch (1½ cups flour + ½ cup cornstarch for 2 cups). Cornstarch lacks gluten and creates a shatteringly crisp exterior.
- Tip #5 – Always Use Buttermilk or Quick Acidified Sour Milk: Buttermilk acidity reacts with baking soda for CO2 production while tenderizing gluten. Make a quick substitute by adding 1 tbsp vinegar/lemon juice to 1 cup milk and resting 5 minutes.
- Idea #6 – Add a Splash of Ice-Cold Seltzer Before Cooking: Fold ¼ cup ice-cold seltzer per cup of batter right before cooking. Expanding carbonation creates micro-pockets of steam on hot plates for extra airiness.
Iron Setup, Pouring & Cooking Rules
- Tip #7 – Preheat Waffle Iron Thoroughly: Preheat iron on medium-high setting for 8–10 minutes. Dropped water drops should dance and sizzle aggressively so the exterior sears instantly upon contact.
- Idea #8 – Brush Plates with Ghee or Clarified Butter: Avoid aerosol cooking sprays that cause sticky polymer buildup. Use a pastry brush to apply a thin layer of melted ghee or clarified butter before each waffle.
- Tip #9 – Pour Batter with a Ladle From Center Outward: Pour batter using a soup ladle steadily in a spiral starting from the center of the bottom plate. Stop ½ inch from the edge to allow natural expansion without overflow.
- Idea #10 – Close Iron Gently Without Pressing Down: Close lid slowly and let its weight press naturally. Never clamp or press down, which squeezes out trapped air and produces dense waffles.
- Tip #11 – Cook Until Steam Output Reduces: Monitor steam output rather than timer lights—thick steam indicates internal water evaporating. Remove waffle when steam reduces to a faint wisp (usually 4–6 minutes).
- Idea #12 – Rest Finished Waffles on a Elevated Wire Rack: Transfer cooked waffles onto an elevated wire cooling rack over a baking sheet in a 200°F oven. Never stack warm waffles or place on flat plates where trapped steam creates sogginess.
Flavor Additions, Textures & Crust Upgrades
- Tip #13 – Add Malted Milk Powder for Diner-Style Flavor: Add 2 tbsp plain malted milk powder (such as Ovaltine) per 2 cups flour to impart a nostalgic, toasty diner flavor profile.
- Idea #14 – Toast Nuts or Coconut Before Adding to Batter: Toast nuts or shredded coconut in a dry skillet and cool before folding in. Toasting drives off excess moisture so ingredients stay crunchy inside batter.
- Tip #15 – Bloom Spices and Extracts in Warm Melted Butter: Whisk vanilla extract, cinnamon, or cardamom directly into warm melted butter and rest 2 minutes so fat carries volatile flavor compounds throughout batter.
- Idea #16 – Substitute ¼ Cup Flour with Fine Cornmeal: Replace ¼ cup flour per cup with fine-ground cornmeal for a rustic, slightly gritty texture that holds maple syrup and fruit compotes well.
- Tip #17 – Fold in Belgian Pearl Sugar for Liège-Style Caramelization: Fold ½ cup Belgian pearl sugar chunks into batter before cooking. Sugar chunks caramelize on hot iron plates to create crunchy amber pockets.
- Idea #18 – Brush Finished Waffles with Simple Syrup Glaze: Lightly brush hot waffles right out of the iron with vanilla simple syrup using a pastry brush to form a thin, glassy, moisture-sealing glaze.
Freezing, Savory Swaps & Pro Serving Tricks
- Tip #19 – Flash Freeze and Reheat in Toaster: Cool completely on wire racks, flash freeze in a single layer on a baking sheet, and store in zip-top bags. Reheat directly from frozen in a toaster or toaster oven.
- Idea #20 – Repurpose Day-Old Waffles into Croutons or Breadcrumbs: Cube day-old waffles, toss with olive oil and spices, and bake at 375°F for 10–12 minutes for salad croutons, or pulse in a food processor for sweet mac-and-cheese breadcrumbs.
- Tip #21 – Rub Microplane Citrus Zest into Granulated Sugar: Rub 1 tbsp fresh lemon or orange zest directly into granulated sugar with fingertips before combining with dry ingredients to release essential citrus oils.
- Idea #22 – Convert Batter to Savory Cheddar-Chive Base: Reduce sugar to 1 tsp, then fold in 1 cup sharp shredded cheddar, ¼ cup chopped chives, and a pinch of cayenne for a savory base suited for fried chicken or breakfast sandwiches.
- Tip #23 – Steam-Clean Iron Plates Between Batches: Wipe hot plates between batches using damp paper towels held with tongs to remove burnt crumbs and prevent bitter flavors from transferring.
- Idea #24 – Serve Warm Syrup alongside Cold Butter Pats: Warm maple syrup while keeping butter pats cold and firm so butter melts slowly over hot waffles to form rich, creamy pockets.
- Tip #25 – Measure Dry & Liquid Ingredients by Weight: Weigh ingredients using a digital kitchen scale (125g flour per cup baseline) to eliminate volume variations caused by scooping methods or humidity.